And here's how you can achieve it, step by step:
 1. First off, make sure you have clean and preferably conditioned hair to make it smooth and sleek. Usually it's best to do this style in the evening/afternoon after you have washed it because it lets your hair settle and makes it easier to manipulate to exactly how you want it and make it stay put!
2. Now I know this may sound strange seeing as were creating a wave but step two is to straighten your hair. I always run my straighteners through my hair before curling it, I find it tames those fly away hairs and also makes the curls much more prominent and bouncy!
3. Make sure your parting is clear and exactly where you want it (you don't want to be shifting it about once you start curling).

4. Clip up your hair so that you have a thin layer left at the bottom.
5. Now the fun part. CURLING! Curl small strands of the hair quite tightly so you are left with tight little ringlets. Looks strange at the moment but trust me it's worth it!
6. Let down another layer of hair and repeat step 5. Just keep working your way up your head until your hair is completely full of well-defined ringlets.
7. Now here's how to achieve the wave. I find spraying it with a tiny bit of Vo5's smoothly does it or any product that helps achieve sleek hair is useful as it helps with the texture and make's it stay put, but it's not necessary, but I really do recommend using a paddle brush for the next step.
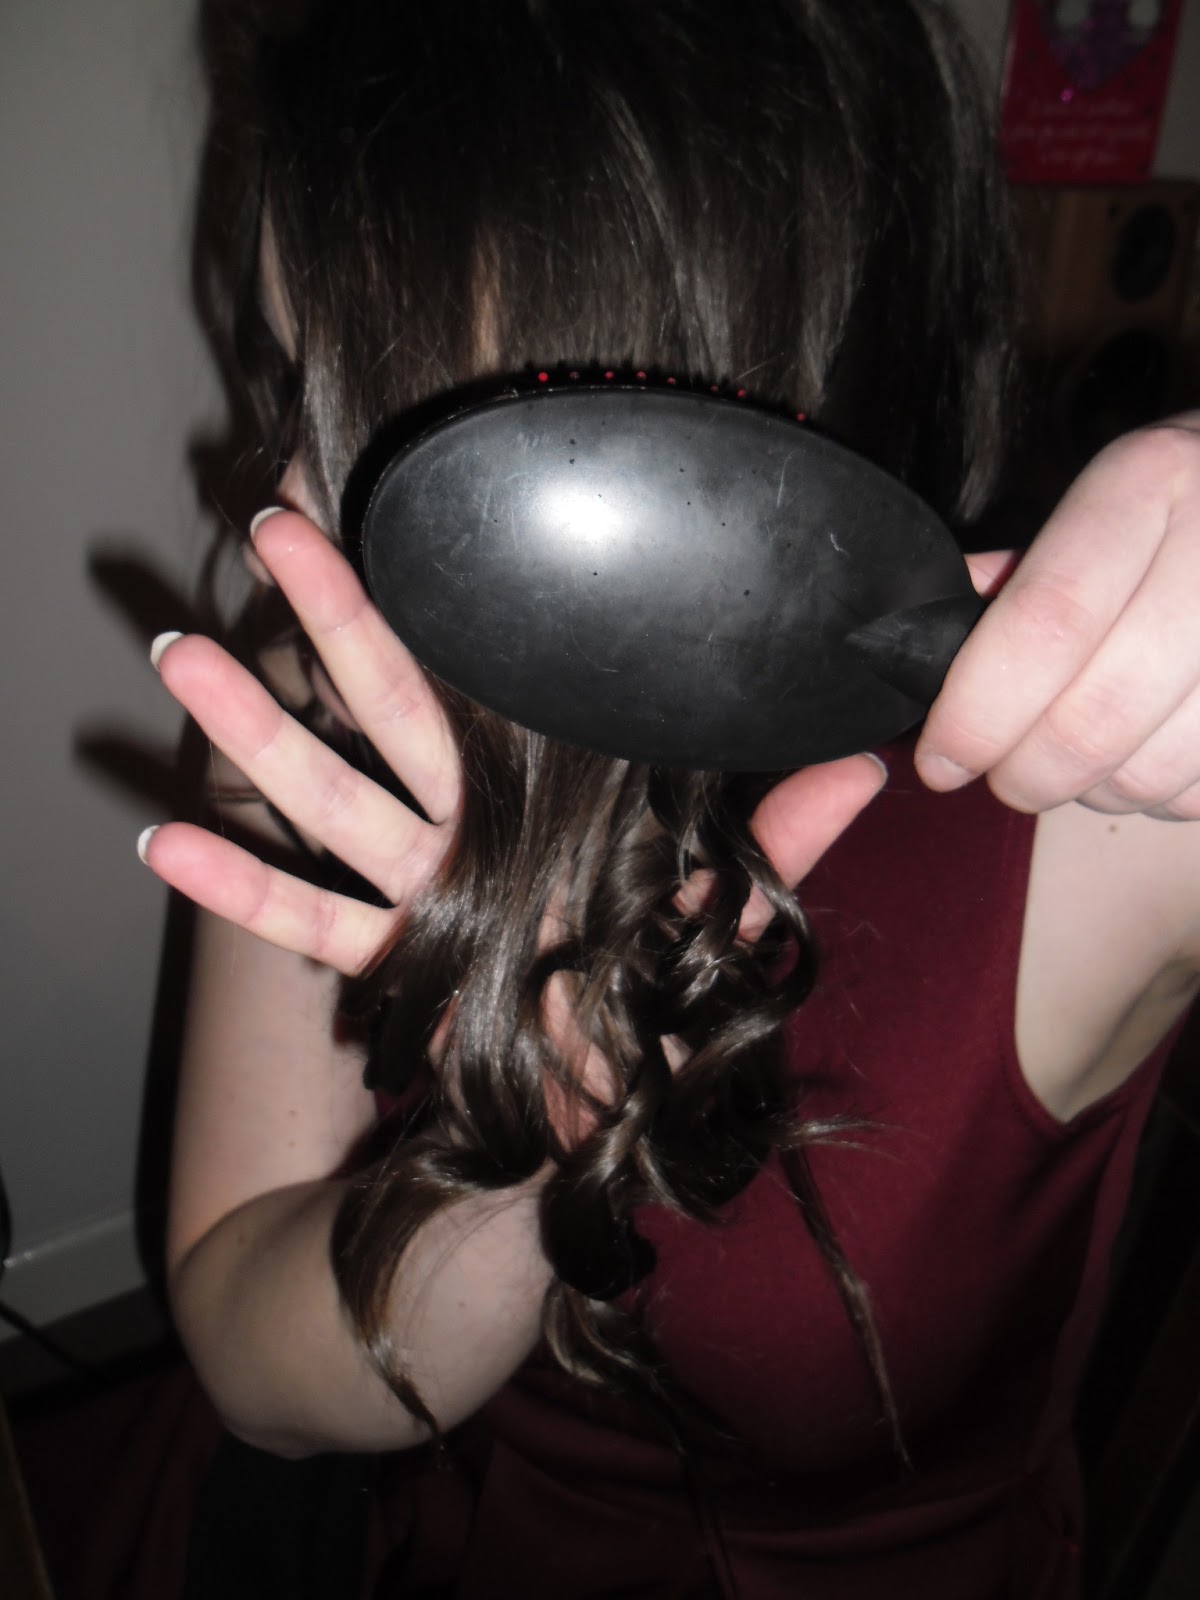
8. Holding a clump of the curls slowly brush the hair. First underneath and then on top pulling the brush slowly through the hair. Repeat this all over your head, careful not to over brush it as you will lose the definition of the wave and probably turn it to frizz!
9. SPRAY! Spray, spray and spray some more! Make sure your hair is fixed so it will stay glamorous for your day/night ahead!
10. And finally pin, accessorize or just style to your heart's content or you may just decide to leave it as it is for a natural look!
So now everyone can achieve this quick and simple look and make it their own! The model I used to do this on in the photograph had rather long hair and it still only took about 35 minutes from beginning to end (with a cup of tea in between) so there's no excuse not to try this glamorous wave!
k.
 |
| Pinned to the side. |
 |
| In a side pony tale. |
 |
| Natural with just a head band. |
Thank you to my
model Charlotte!
I love this! But I have rather damaged hair (after years of dying it :( :() so if I did this I know it will go very frizzy... and huge like an afro! I will try it out though when my hair is better :D great article! x
ReplyDeleteHi, great article I am deffo going to give it a try! Thanks for putting it up :) Please tell me does your model dye her hair? as I like the shade :) x
ReplyDeleteThank you! i had great fun writing/doing this article! she doesn't dye her hair, its all natural! (i know im jealous too!) :) x
Delete